|
Module 3 — Lighting Module Objectives By the end of this module, you will be able to:
Introduction Understanding a couple of key tricks with lighting will make the difference between amateurish pictures and professional-looking photographs. These tricks can be easily learned and applied, and will improve your photographic quality ten-fold! The root of the word Photography comes from Greek, and means "Drawing with Light." We need to train our eye to see light differently. Film sees light in a much more limited way than our eye does. Our eye automatically compensates for the colour of light, seeing florescent, incandescent, midday sunlight and sunset light as white, while film will give overall casts of green, yellow, blue and orange, respectively. The eye will also compensate for light and dark areas of a scene, whereas film is much less forgiving between bright-lit areas and shadow. This module will help you understand the different qualities of light to watch for, see how light will be captured by the film, and manipulate existing or artificial light to achieve a natural, pleasing effect.
Qualities of Light There are three fundamental qualities of light to be aware of:
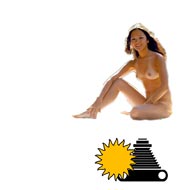
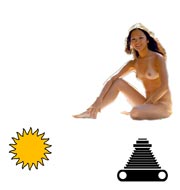
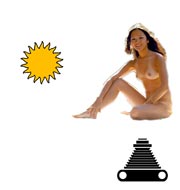
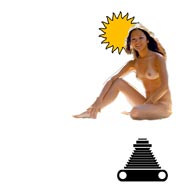
Let’s discuss each of these. Direction There are four basic directions that light can fall on a subject:
Exercise Take an object and a table lamp or other single light source. Experiment by placing the light in front of, at 45o to, 90o to, or behind, the object. Notice the difference in shadows, texture, and shape of the object at each position. Colour Although the human eye compensates for the various colours of light that are present in the world, film is not so forgiving. It is adjusted for daylight, although even that can change from hour to hour. The best time of day for daylight film is about two hours after sunrise and two hours before sunset. Daylight film is also well balanced for a flash or "strobe." Anything else, and you’ll find a tint to your pictures. If you’re using slide film, you need to take some specific actions while shooting to compensate, but generally negative film can be adjusted in the printing process. Be aware, however, that your corner photo lab probably won’t make that compensation. Note: Obviously this is not a consideration with Black and White film!
Exercise Look at the light provided in each of the situations above, and practice seeing its true colour. See the orange at sunset, the yellow of artificial indoor lighting, and the blue at midday, particularly if it’s overcast. See the effect of these colours, particularly on skin tones. Intensity The intensity of light refers to how strong the lighting is, and how large the light source is in relation to the subject. A large light source is said to provide diffuse or soft light, while a small light source is said to provide directional or hard light. Typically, for portrait work, you will want to use a diffuse light source, for the simple reason that hard light emphasizes all the small imperfections of the body. Fill Light One way to soften the effect of a hard light source is by bouncing some light back onto the shadow side of the subject, or using a second light source to lighten the shadow. Remember, some shadow isn’t bad; it provides some modeling to a face that gives a three-dimensional look to a photograph. But keep contrast between light and shadow low, that way you won't run into details disappearing in either shadows or highlights. Blocked-out highlights or shadows looks very unattractive in photographs, and are the prime technical mistake of amateur photographs (next to unsharp photos). Fill can be achieved by holding a reflector fairly close (about one-to-two feet) to the subject, bouncing light onto the shadow side. A piece of white cardboard or Styrofoam works very well. If you are using a second light source, be sure that it does not create a second shadow. Seeing two sets of shadows can be disconcerting to the viewer, and will detract from the look you’re trying to achieve. Putting it All Together Outdoors How Not to Do It Your typical amateur photographer will take the subject on a bright sunny day, place them with the sun high overhead, with the subject looking into the sun, and snap a picture. The result will be a flat, stark, bluish cast photograph, with the subject squinting, and dark shadows cast under her nose, eyes, and chin. Let’s analyze why.
How to Fix It Believe it or not, some of the best lighting for portrait pictures is on an overcast day. This turns the entire sky into your light source, providing a more flattering, very diffuse light. Thick dark clouds don’t work too well, since you lose too much light and your colours become muted. But an overcast that allows your subject to look at the sky without squinting can be perfect. What do you do if it’s not overcast? Find some shade and place your subject in it. This can be under a tree, in the shade of a building, or under any other shade-producing object. Be careful that your subject doesn’t take on the colour of the object that is making the shade. A bright orange umbrella, or the green leaves on a tree, can give your subject a tint that may not be very flattering. Try to keep the colour well away from your subject. If you have a reflector, you can use that to bounce some white light onto your subject. Another solution is to shoot during the early morning or late afternoon. Because of the haze in the sky, the sun becomes a larger source. Watch for squinting, and be prepared to fill in shadows. Position the sun either behind your subject for a halo effect, or at a 45o angle. If the sun is behind the subject, watch for lens flare, and expose very carefully! For further information on exposing for back lighting, see Module 4 -- Exposure. Indoors While the outdoors can provide you with an abundance of free light, indoor lighting gives you much greater control. Types of Indoor Light
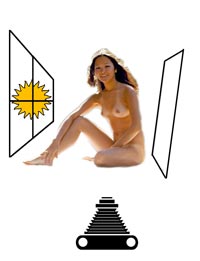
Two Lighting Setups That Will Give You Professional Results 1 — Single Light Source, With Bounce Fill Position your subject close to a window. Early morning or late afternoon light is best, but the light should not be shining directly in the window onto the subject. You can use a piece of cardboard or Styrofoam to fill in the shadow side of the subject a little, or, for a more dramatic effect, leave it unfilled. See the diagram below for a detailed view of the setup. An incandescent light near the subject’s hair, or in the background, can add a nice warm glow to the overall scene.
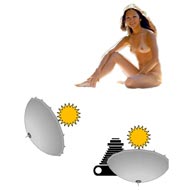
2 — Dual Artificial Source Position your main floodlight or flash four feet from your subject, bounced towards a piece of cardboard or into a photographic umbrella, at a 45o angle to your subject. Position a second, or fill, light as close to the camera position as possible, but five to six feet from the subject. The idea is that you want a fill light that a) doesn’t cast it’s own shadow, thus the position right next to the camera, and b) that is less intense than the main light, still allowing the shadow from the main to be seen, but with less contrast. By moving the fill light 50% further from the subject than the main, you achieve a 2:1 light ratio, which is just about right for a female subject with colour film. You can go to a 3:1 ratio with black and white film by moving the fill light out 200% as far from the subject as the main.
Summary You’ve now learned some of the secrets to effectively lighting your photographs, including these two key elements of success that will set you apart from the amateur:
You’re now ready for the last module: Exposure. Course main page |
Course main page |
